Wednesday, December 28, 2011

Cedar Pollen Under the Microscope

Cedar pollen, for those with allergies, causes burning eyes, runny nose, itchy ears and excessive sneezing.  Cedar pollen allergies are typically much worse than ragweed. This is due to the biochemical structure of cedar pollen's protein coat, which appears to have properties that make it unusually noxious. The sheer quantity of the grains compounds these problems.

Image of cedar pollen captured with a biological microscope and the Jenoptik CT3 microscope camera.

Pollen is a fine coarse powder containing the microgametophytes of seed plants. Pollen grains have a hard coat that protects the sperm cells during the process of their movement from the stamens to the pistil of flowering plants.

Thursday, December 22, 2011

Green-Winged Macaw Kidney

The Green-winged Macaw is a large, red colored bird found in the forests and woodlands of northern and central South America.

Photo courtesy of Arjan Haverkamp.

The Green-winged Macaw can be up to 49" with a total body length of 39" and will weigh approximately 2.5-3.5 lbs. This bird has a very powerful beak that can generate pressure up to 2000 psi, which can snap a broomstick in half. This powerful beak has evolved to crush or open some of the hardest nuts and seeds.

This image of a Green-winged Macaw's kidney was captured with a biological microscope and the PRC3 microscope camera.

Friday, December 16, 2011

Science Project: Chemicals and Food Under the Microscope

A fun science project that can be performed at home requires a quick run through the laundry room or kitchen to gather supplies. Using a high power biological microscope and slides, many of the following items can be viewed on a wet mount slide, or as a dry mount slide. Notice how the same item looks different under the microscope when it is dry versus when it is saturated with water. Try viewing the following items under the microscope. Start at the lowest magnification, get the items in focus, then move up to higher magnifications.

  • Epsom salts
  • Alum
  • Washing Soda
  • Salt or Sugar
  • Honey
  • Plain Yogurt
  • Moldy bread, potatoes or fruit
  • Soap (try several types - put a small film of soap on a slide to view)
  • Flour
 Sugar crystals under the microscope.

Thursday, December 15, 2011

Microscope Science Project: Paper Pulp

For this microscope science project you will need the following items:
High school student microscope.
Student Microscope

Ask your parents to help you place a small amount of water in the blender with a small bit of paper. If your paper is thick it will take a while for the water to soak into the paper. Blend the paper in the blender until it is a thin pulp. Take a small piece out and place it on your slide, covering it with a cover slip. Place the slide under the microscope at the lowest magnification (40x). What does the paper pulp look like? Can you view the fibers of the paper? Clean out the blender and repeat the same process using newspaper. The newsprint should dissolve much more quickly. How different does the pulp from the newsprint look under the microscope? Are the fibers smaller or shaped differently?

Wednesday, December 14, 2011

Gemological Microscopes

Gemological microscopes should provide rugged dependability, excellent optics and versatility with a variety of stages and accessories available. Jewelry designers and outlets use stereo microscopes set up with brightfield and darkfield transmitted illumination for viewing precious stones.

View a variety of gemological microscopes here.

Tuesday, December 13, 2011

Kids Microscope Project Ideas

Kids curiosity about science can often be satisfied with multiple microscope projects. Below are some ideas of things that can be viewed either with a low power stereo microscope or with a high power student biological microscope. If you have access to both microscopes - compare the objects under the two different microscopes. What do the items look like at different magnifications? Keep in mind, when using a high power microscope that the light will shine up through the object. Therefore, the items being viewed must be thin or somewhat transparent, in order for light to pass through them, and in order to see the specimen clearly through the microscope.

 Print on a holiday napkin.
  • Sugar and salt crystals (place these on a slide when using the high power microscope).
  • Fibers from yarn or wool (carpet works well!)
  • Newsprint (best viewed under a low power microscope with light from above).
  • Cork - thinly cut.
  • Thin weave cloth such as a gauze strip.
  • Bark from a tree.
  • Flower stamen.
  • Water from an old flower bouquet (place it on a depression slide, use a cover slip).
  • Spider web (mount directly on a microscope slide).
  • Celery stalk (stem or small cross section).
  • Insect wing (check your windowsill!)
  • Piece of hair (can you see the root using the high power microscope?)
  • Feather.
  • Soil.

Cloth weave captured at 40x with the MW5-LD2 digital stereo microscope.

Monday, December 12, 2011

Stereo Microscope Magnification

Ever wonder what things look like at different magnifications under a digital stereo microscope? Below are some images to help you picture different items at varying magnifications.

Lens paper captured at 60x magnification using the MW5-LD2 60x stereo microscope.

String captured at 10x using the MW1-LD2 digital microscope.

Dollar bill at 40x magnification, captured using the MW1-LD1 microscope.

Quarter captured at 20x magnification with the MW1-LD1 microscope.

Hair captured at 90x magnification using the EMZ-13TR stereo microscope.

Capacitor captured at 75x magnification using the SMZ-168 stereo microscope.

Wednesday, December 7, 2011

Ken-A-Vision Microscope New Arrivals

Microscope World is pleased to offer some new products from Ken-A-Vision, including the research biological microscopes with Infinity corrected optics.

The Ken-A-Vision T-29034 series of microscopes include Infinity corrected optics available in standard, semi-plan or plan. The microscopes are available in binocular or trinocular (for mounting a camera). These microscopes were designed with durability and ergonomic features in mind, at an affordable price point.

The Ken-A-Vision T-19241C comparison microscope was created for forensics and comparative science. This comparison microscope allows side-by-side comparisons of two slides as well as the ability to view each slide individually. The microscope has high-quality optics and precision mechanics. 

The Autofocus Vision Viewer 7880 is a document camera with 1.3 mega pixels that is easy to use and made to be nearly indestructible - perfect for the classroom! A pre-attached USB cable allows for simple plug-and-play use and all controls are handled with the computer mouse. Compatible with interactive whiteboards. Available in a variety of colors.

Tuesday, December 6, 2011

Veterinarian Microscopes

Veterinarians require specific features when using a microscope. High quality optics are essential for viewing parasites, cancerous tumors, bacteria, blood cells and other specimens. 400x magnification is used regularly, although 1000x magnification is utilized as well to view more details in specimens. Most veterinarians prefer a Siedentopf binocular head, for eye comfort while looking through the microscope. Digital microscopes are generally useful in a vet office, as samples can be labeled, saved to a chart, or emailed.

Monday, December 5, 2011

Fingerprint Science Project

Ever wanted to view your fingerprints in detail? Or compare your fingerprints to someone else's? This science project will allow you to view and compare fingerprints and requires only a few supplies. You will need the following:

Take a square piece of packing tape and press it firmly onto your thumb or index finger. Peel the tape off and without touching the sticky side of the tape, press the fingerprint portion onto a blank glass slide. Place the printed portion of the slide directly above the light on the microscope. Using the 4x objective (40x magnification) focus the microscope. If you are using a digital microscope, capture an image and save it. Then take another print and compare the two. How do they differ in shape and pattern? Collect five fingerprints from different people and label the slides. Do you think it would be hard to perform investigative work using only fingerprints as identifiers?

Friday, December 2, 2011

Digital Student Microscope

The MW1-HD2 digital student microscope includes a built-in LCD display screen for viewing live images by multiple students. This children's microscope includes software for viewing images on the computer (640x480) or 5 megapixel images can be captured to the SD Card by pressing a button beneath the LCD screen.

The microscope includes software, USB cable, box of glass blank and prepared slides as well as a carrying case.

Dicot captured with MW1-HD2 digital microscope using SD Card.

Human blood captured with the same digital microscope setup.

Wednesday, November 30, 2011

Microscope Heating Stages

In microscopy, an increasing number of investigations are using live-cell imaging techniques to provide critical insight into the fundamental nature of cellular and tissue function, especially due to the rapid advances in fluorescent protein and synthetic fluorophore technology. Because of these advances, live-cell imaging is being utilized in most cell biology laboratories, as well as in the fields of neurobiology, developmental biology, pharmacology, and many other related biomedical research disciplines. A major challenge in performing successful live-cell imaging experiments is keeping the cells in a healthy state and functioning normally on the microscope stage while being illuminated in the presence of synthetic fluorophores and/or fluorescent proteins.

Advances in scientific methods and protocols in the last few decades have allowed cells and cellular activity to be studied in great detail by providing a natural environment through the control of temperature, humidity and gas ratios in an incubator. If the samples are removed for more than a short period of time, the cellular processes begin to exhibit stress, deterioration begins and the tissue or cells are no longer in an optimal state.

It is important that when using a microscope heating stage, the entire bottom of the stage is heated to eliminate temperature gradient. Temperature should remain stable, as fluctuations can damage specimens.

Tuesday, November 29, 2011

Well Logging

Well logging, borehole logging, hydrocarbon well logging or mud logging as it is often referred to is the process of creating a detailed record of the geology formations penetrated by a borehole. The log is usually based on visual inspection of samples brought to the surface, or on physical measurements made by instruments that are lowered into the hole. Well logging is performed during many phases of a well's history - either in the beginning when exploratory drilling is in process, during the production phase, or upon completion and abandonment of a well. Boreholes are drilled in search for oil, gas, groundwater, minerals and other geothermal or environmental studies.

In order to detect oil and gas in particular, well cuttings are examined with a low power stereo microscope, often using darkfield or pseudo-darkfield. The darkfield helps in identifying oil staining and the lithology of the borehole rocks. The lithology is a description of the rocks' physical characteristics visible in samples.


The oil and gas industries record rock and fluid properties to find hydrocarbon zones in the geological formations found in a borehole. The entire process will consist of lowering a logging tool into an oil well (hole) to measure the rock and fluid properties. Logging is performed as the logging tools are pulled out of the hole and data is recorded. The drilling depth when well logging can range from 500 feet to 35,000+ feet.

In the oil industry the well and mud logs are typically transferred to the operating company in real time, as these logs are used to make operational decisions about the well and to correlate information about the depths of surrounding wells. 


Monday, November 28, 2011

Asbestos Bulk Fiber Identification

Asbestos bulk fiber identification is performed using a polarizing microscope. The most common method used for bulk fiber identification is by following NIOSH 9002 standards. Polarized light microscopy measures the percentage of asbestos as perceived by the analyst in comparison to the standard projections, photographs or experience. The quality of the results are dependent upon the skill and judgement of the operator.

Asbestos bulk fiber identification microscopes that meet NIOSH 9002 standards include a polarized light microscope 100x - 400x with a 10x dispersion staining objective. A stereo microscope with 10x - 45x is also often used.

Dispersion staining is a process where color is imparted to colorless objects with a refractive index measured and used to identify the object being tested. Microscope World's asbestos bulk fiber identification microscopes use 10x annulus dispersion staining objective for the infinity corrected microscope. Different colors are observed when the fiber is oriented parallel or perpendicular to the polarizer direction. You can learn more about the US Center for Disease Control's NIOSH 9002 methods here.

Thursday, November 17, 2011

Microscopic Creatures

This is a simple science project you can perform at home. Gather four different samples of water - for example, some tap water, water from the ocean or a pond, water from the puddle near the curb outside your house, and water from a bird bath.

Using a microscope such as the kids microscope MW1-H1, place a drop of your water sample on a depression slide and put a cover slip over it. Make sure you keep the different types of water samples labeled and separate. What types of bacteria or other creatures can you find? Start out at 40x magnification, then work your way up to 100x and 400x magnification.

Below are some images of things you may be able to identify through your mircoscope.

Euglenas - found in both fresh water and salt water. Learn more about Euglenas here.
Protozoans - most commonly found in pond water, protozoans can easily be viewed with a microscope at 400x magnification. You can learn more about protozoan learning tools here.

Photo courtesy of Eric Guinther.

Algae - found in the ocean in the forms of kelp and seaweed, these plants come in a variety of shapes and colors.

Take notes on the types of microscopic creatures you find in the variety of water collected. If you can capture images of them or sketch the organisms so you can share your findings with your science class.

Thursday, November 10, 2011

Microscope Close Out Specials

Microscope World currently has three microscopes on close-out special. When they are gone, the sale is over. You can view the close-out specials here.

Model 170 microscope has 40x, 100x, 400x magnification, includes a lifetime warranty and free slide kit and DVD accessories. Save over $150!! This microscope is on sale for $179.

Model 170-MS microscope is similar to the 170 except it also has 1000x magnification and includes a mechanical stage. Save over $200 on this microscope - it is on sale for $329.

Swift Microscope M6001CL-DGL offers 40x, 100x and 400x magnification. The microscope includes a built-in 1.3 mega pixel digital camera and includes software for viewing a live image on your computer. Includes mechanical stage, lifetime warranty and free slide accessories as well as the DVD "Adventures with a Microscope." Save over $199 - on sale for $599.

Wednesday, November 9, 2011

Marine Life: Serpent Star (Ophiura)

The serpent star looks similar to a starfish. Found in the North-east Atlantic ocean from Norway to the Mediterranean, the Ophiura is a brittle star that lacks brilliant colors, allowing the serpent star to camouflage itself rather than hiding in crevices.

Ophiura photo courtesy of Hans Hillewaert.

The serpent star lives on muddy or sandy substrate, sometimes partially buried. The central disk of the Ophiura will grow to a maximum of about 3.5cm.

This image of Ophiura was captured using a microscope and a Jenoptik C14+ microscope camera.

Monday, November 7, 2011

Thymus and the Immune System

The thymus is a specialized organ of the immune system. The thymus produces T-lymphocytes (T-cells), a critical part of the adaptive immune system. T-cells attack foreign substances. T-cells have receptors that are generated by randomly shuffling gene segments. Each T-cell attacks a different substance. T-cells that attack the body's own proteins are eliminated in the thymus.

Thymus image captured with a biological microscope using a Jenoptik microscope camera.

The thymus is composed of two identical lobes and is located in front of the heart and behind the sternum. The thymus is largest and most active during the neonatal and pre-adolescent periods.  By the early teens, the thymus begins to atrophy and thymic stroma is replaced by fat tissue.  Nevertheless, residual T lymphopoiesis continues throughout adult life.

Thursday, November 3, 2011

Science Project: Microorganisms in Soil

Will plants grow if there are no microorganisms in the soil? This science project will help you answer this question.

Microorganisms are very diverse and live in all parts of the environment including water, soil, in the ocean, and even deep within the earth's crust. They are a critical piece of nutrient recycling in ecosystems, as they act as decomposers. Microorganisms include bacteria, fungi, protists and algae to name a few.

Bacteria is an example of a microorganism.

E. Coli is also a microorganism.

Required items for experiment:
  • Soil
  • Baking pan
  • Seeds
  • An area outside or in pots to plant the seeds with sunlight
Optional items:
In order to figure out if microorganisms help plants grow, you will want to take your soil and divide it into two equal portions. Place one of those portions in a pan and bake it in the oven at 350 degrees for about 30 minutes (ask your parents for help with this!) Baking the soil will kill any microorganisms that are present in it. The other portion of soil should be left as it is.

If you have a microscope - take a small amount of soil from each sample and place it under the microscope. Do you see any microorganisms in the soil that was not baked? You will want to use a high power microscope at 400x magnification in order to view microorganisms.

Plant your seeds in each section of soil (make sure you label the one you baked). Ensure that each section of soil gets the same treatment including equal sunlight, watering and weeding.

What do you notice during the growing process? Did the plants in the soil full of microorganisms turn out differently than those where the microorganisms were killed? Document your results.

Wednesday, November 2, 2011

Science Laboratory Safety Guidelines

Below are some suggestions for a safer science laboratory environment.
  1. Create a safety plan for the lab that all teachers are educated and up to date on.
  2. When planning a laboratory activity, always ask yourself if there is another investigation that could teach the same concept more safely.
  3. Require everyone in the laboratory to wear appropriate safety equipment - including visitors.
  4. If microscopes are being used, make sure cords are not stretched across walking areas - tripping on a cord could cause chemical spills, damaged microscopes and injuries.
  5. Have a plan in place in the event of an accident.
  6. Do not allow anyone to work alone in the lab, including teachers.
  7. Store all chemicals in an appropriate secured room when they are not in use.
  8. Test all safety systems at a minimum of once a month.
  9. Test safety shower, eyewash, drench hose, etc. each week and create a safety log to ensure regular testing procedures.
  10. Do not allow eating and drinking in the science lab.
  11. Keep only minimum amounts of chemicals on hand. Those that are no longer used should be disposed of properly.
  12. Maintain a clean working environment.
  13. Ensure students understand the properties of each chemical being used for experiment, as well as safety procedures.
  14. Require all science teachers to participate in a NIOSH-approved safety course every five years.
  15. Consider showing the class a science safety video at the beginning of each semester.
High School Microscope
High School Microscope HS-1M

Tuesday, November 1, 2011

Digital Child Microscope

The DM52 digital children's microscope includes three magnifications: 40x, 100x, and 400x. The microscope can be used as a standard student microscope, or a digital microscope and is perfect for viewing cheek cells, protozoans found in pond water, or blood cells.

Spider captured at 40x magnification under the DM52 digital kids microscope.

When plugging the microscope into the USB port on the computer and opening the included software, live images can be viewed on the computer. The microscope includes software for teachers as well as student software. The software can be used to capture still and moving images, text can be added to images and measurements can be made.

The digital children's microscope includes a slide kit with prepared slides, blank slides, cover slips and a DVD entitled "Adventures with a Microscope." It also includes access to a password protected resource section of Microscope World's website with activities for kids, worksheets and science fun for kids.

You can view more images captured with the DM52 here.

Monday, October 31, 2011

Vibrationa Isolation Tables and Platforms

In microscopy, vibrations can make time lapse imaging unusable and micromanipulation impossible. Vibration isolation platforms and vibration isolation tables are designed to stop vibrations from being transmitted to the microscope or other sensitive equipment, thus insuring a more stable platform for imaging, microsurgery and in-vitro fertilization. 
These vibration isolation tables and platforms use a passive mechanical design that does not need compressed air or hoses and requires no maintenance. The vibration isolation bearings eliminate low frequency effects in both the horizontal and vertical directions.

Here are a few other tips for dampening some of the vibrations that are often a part of the modern lab environment:
  • Place the equipment away from obvious problem areas like elevator shafts, heating and cooling fans, and even vents.
  • Put other equipment such as shakers, refrigerators, and incubators on a separate table away from the microscope.
  • Put power supplies on a shelf or on the floor away from the equipment.
  • Use the heaviest table available.
  • Put a thin foam pad between the microscope and the table.

Friday, October 28, 2011

Measuring Microscopes

Measuring microscope systems are composed of high quality metallurgical microscopes with Japanese optics, precision X-Y stages and durable heavy-duty stands. Digimatic readouts are available for X, Y and Z axis and can be set for English or Metric measurements.

Measuring microscope systems are available with a simple binocular viewing head, or a trinocular head configured with a camera for capturing and/or viewing live images on a monitor. This often helps operators perform visual inspection and measurement of small parts and components without complicated system preparations. Illumination provides relfected and/or transmitted light. The measuring microscope systems include 50x, 100x, 200x and 400x magnification and optional objectives can be added to increase magnification to 500x, 600x or even 1000x. For questions about metallurgical measuring microscope systems please email us.

Thursday, October 27, 2011

Gout Microscopes

For specialized medical applications such as identifying gout or CPPD (pseudo-gout) crystals suspended in synovial fluid, gout microscopes assembled specifically for gout identification are used by labs and health professionals worldwide.


Medical professionals diagnose gout by taking synovial fluid from the infected joint in the process of arthrocentesis. Lab technicians prepare a wet smear on a slide and use polarized microscopy to determine the presence of sodium urate crystals (gout) or calcium pyrophosphate dehydrate or CPPD within the fluid extracted from the infected joint. CPPD crystals are small rods, squares, or rhomboids and are usually harder to identify without a gout or polarized light microscope.

Polarizing filters can easily be adjusted when using the gout microscope, and the beam splitter allows light to be directed directly up to the camera if images need to be captured. If you have questions about a specific gout microscope setup, please email us.

Wednesday, October 26, 2011

What Magnification Do I Need?

Working with microscopes, we often get asked what magnification is needed to look at a variety of specimens. Here are some common items that are viewed under the microscope and the magnification required to view them.

  • Blood - a minimum of 400x magnification is best for viewing blood cells. The nucleus of a blood cell can be seen at 400x magnification, but more detail can be viewed at 1000x.
  • Bacteria - 400x magnification is required in order to identify bacteria.
  • Coins - it is best to view coins anywhere between 10x-30x magnification.
  • Stamps - stamp collectors most commonly use 20x magnification.
  • Printed circuit boards - between 10x-40x zoom magnification typically makes viewing details and flaws on printed circuit boards easier. The stereo zoom function is helpful.
  • Insects - anywhere between 10x and 30x magnification is best for viewing spiders, ants and insects.
 Human blood under the microscope at 400x magnification.

Tuesday, October 25, 2011

Children's Microscopes

With the holidays just around the corner, finding creative holiday gifts for kids can be a challenge. Microscopes make great educational gifts for kids.

Below you will find our four top choices for children's microscope gift ideas.

The 109L microscope is available either as a cordless model or corded. This microscope has 40x, 100x, and 400x magnification. Perfect for kids ages 6+, this microscope has glass optics and both coarse & fine focusing, making it easier to get a crisp and clearly focused image. The microscope is perfect for viewing pond water, or one of the ten prepared slides that comes free with the microscope. The microscope also includes a DVD "Adventures with a microscope", access to our Educational Resource Library with activities and print-outs for kids to use with the microscope, as well as blank slides and cover slips to create their own specimens.

The D-EL1 digital microscope is perfect for capturing images, or viewing them live on the computer. The built-in LED light illuminates insects, coins, or anything else the camera is magnifying. The included software allows you to capture and save images for future reference on the computer. Camera includes a metal stand (as shown).

Model 185 microscope offers 20x magnification and requires no additional light in order to view specimens. This microscope is perfect for children ages 5+. It's a great microscope for viewing insects, flowers, currency - anything that you can hold in your hand, but want to see in a bit more detail. Newsprint is especially fun to look at under the microscope, as you can view the small dots of ink on the paper.

The DM52 digital kids microscope makes a great holiday gift. This microscope has 40x, 100x and 400x magnification. It can be used as a stand-alone microscope, or it can be hooked up to the computer. The included software allows you to view a live image on the computer, capture and save images and even make measurements. The microscope includes the following free accessories: DVD "Adventures with a Microscope", prepared slides, blank slides and access to the customer educational resource section of Microscope World's website.

Monday, October 24, 2011

TRITC Fluorescence

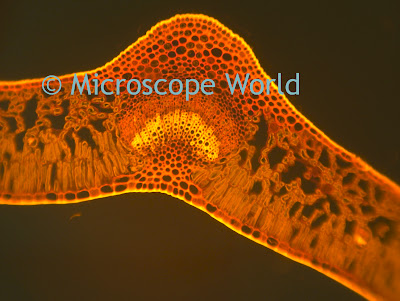
TRITC is a common filter set used with an epi-fluorescence microscope. The images below are of privet leaves - a plant introduced in the US from China for ornamental planting. These plants have become very invasive in the southern US.

 40x magnification.

These images of a c.s. of a privet leaf were captured using a TRITC filter on the MT6300 epi-fluorescent microscope. The PRCFscan microscope camera was used to capture the images.

100x magnification.